南二区产后访视试点
🎦 向左走 向右走
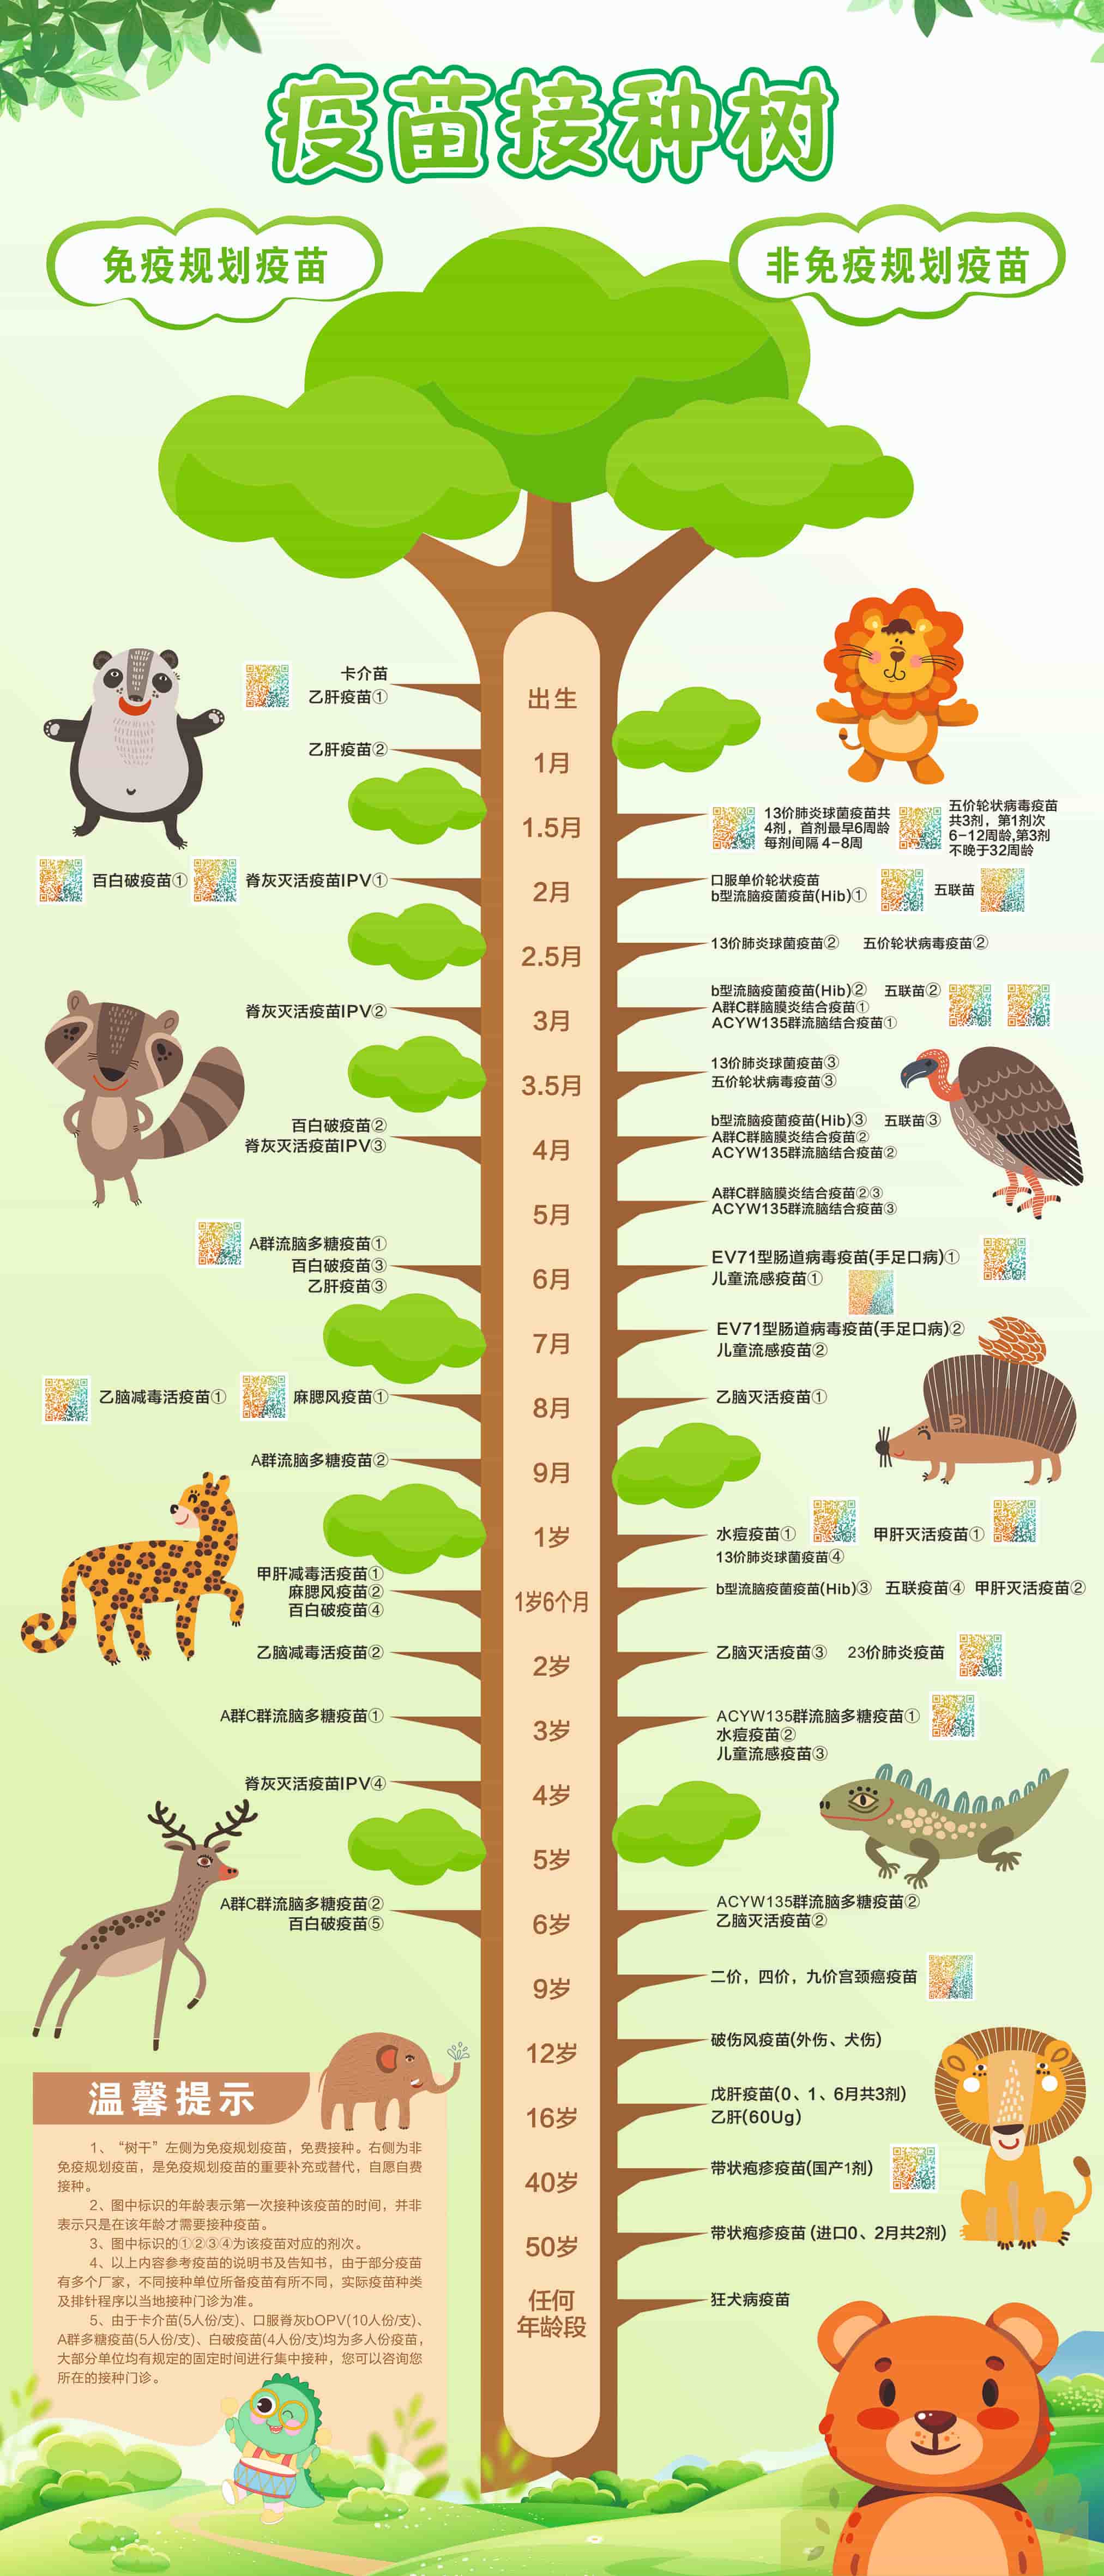
📖 疫苗树
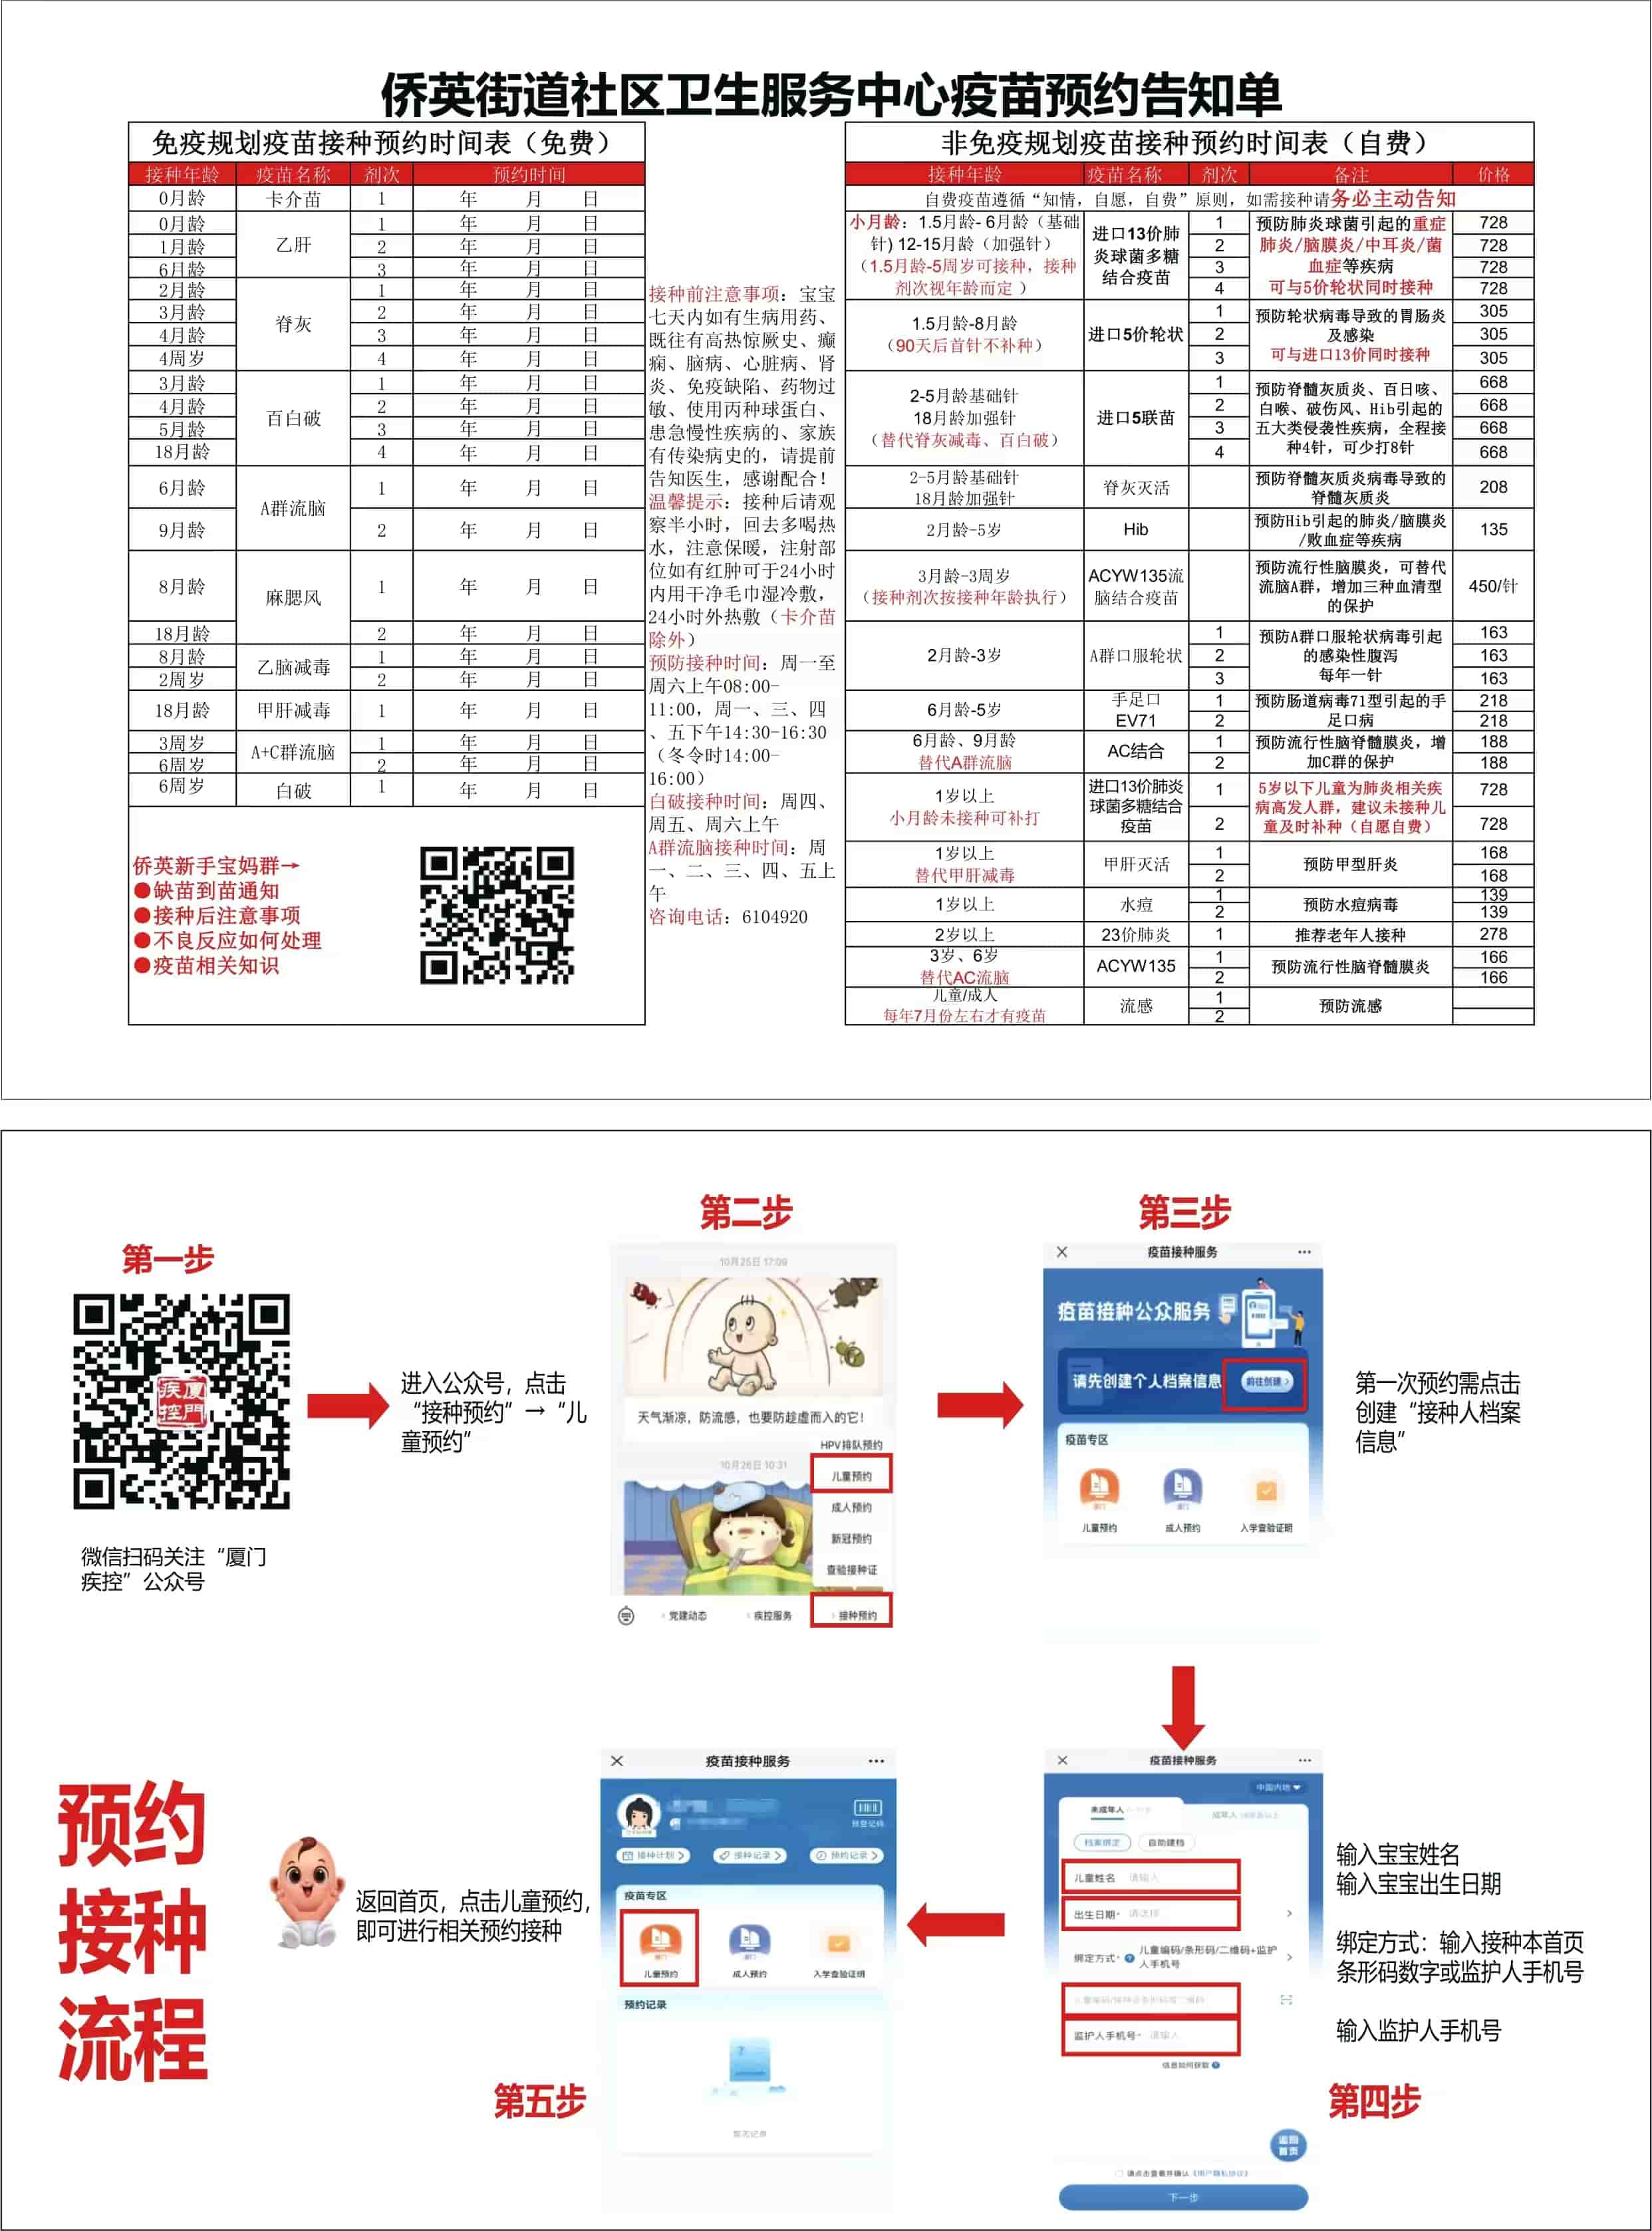
📖 泉州市泉港区界山镇卫生院
📖 泉州市泉港区界山镇卫生院疫苗预约告知单
👶 泉州市泉港区界山镇卫生院宝妈群
📖 疫苗知识大闯关
